Review and restore
When Henosia finishes a step, read its summary, try the result in the preview, and ask for changes if something isn't quite right. Henosia creates checkpoints automatically as it works, shown as dotted lines in the chat, so you can inspect or undo changes at any point.
Compare changes
To see every file Henosia changed since a checkpoint, choose Compare on that checkpoint in your chat.

Compare opens the code view and shows every file that changed since that point. Removed lines are red and added lines are green.
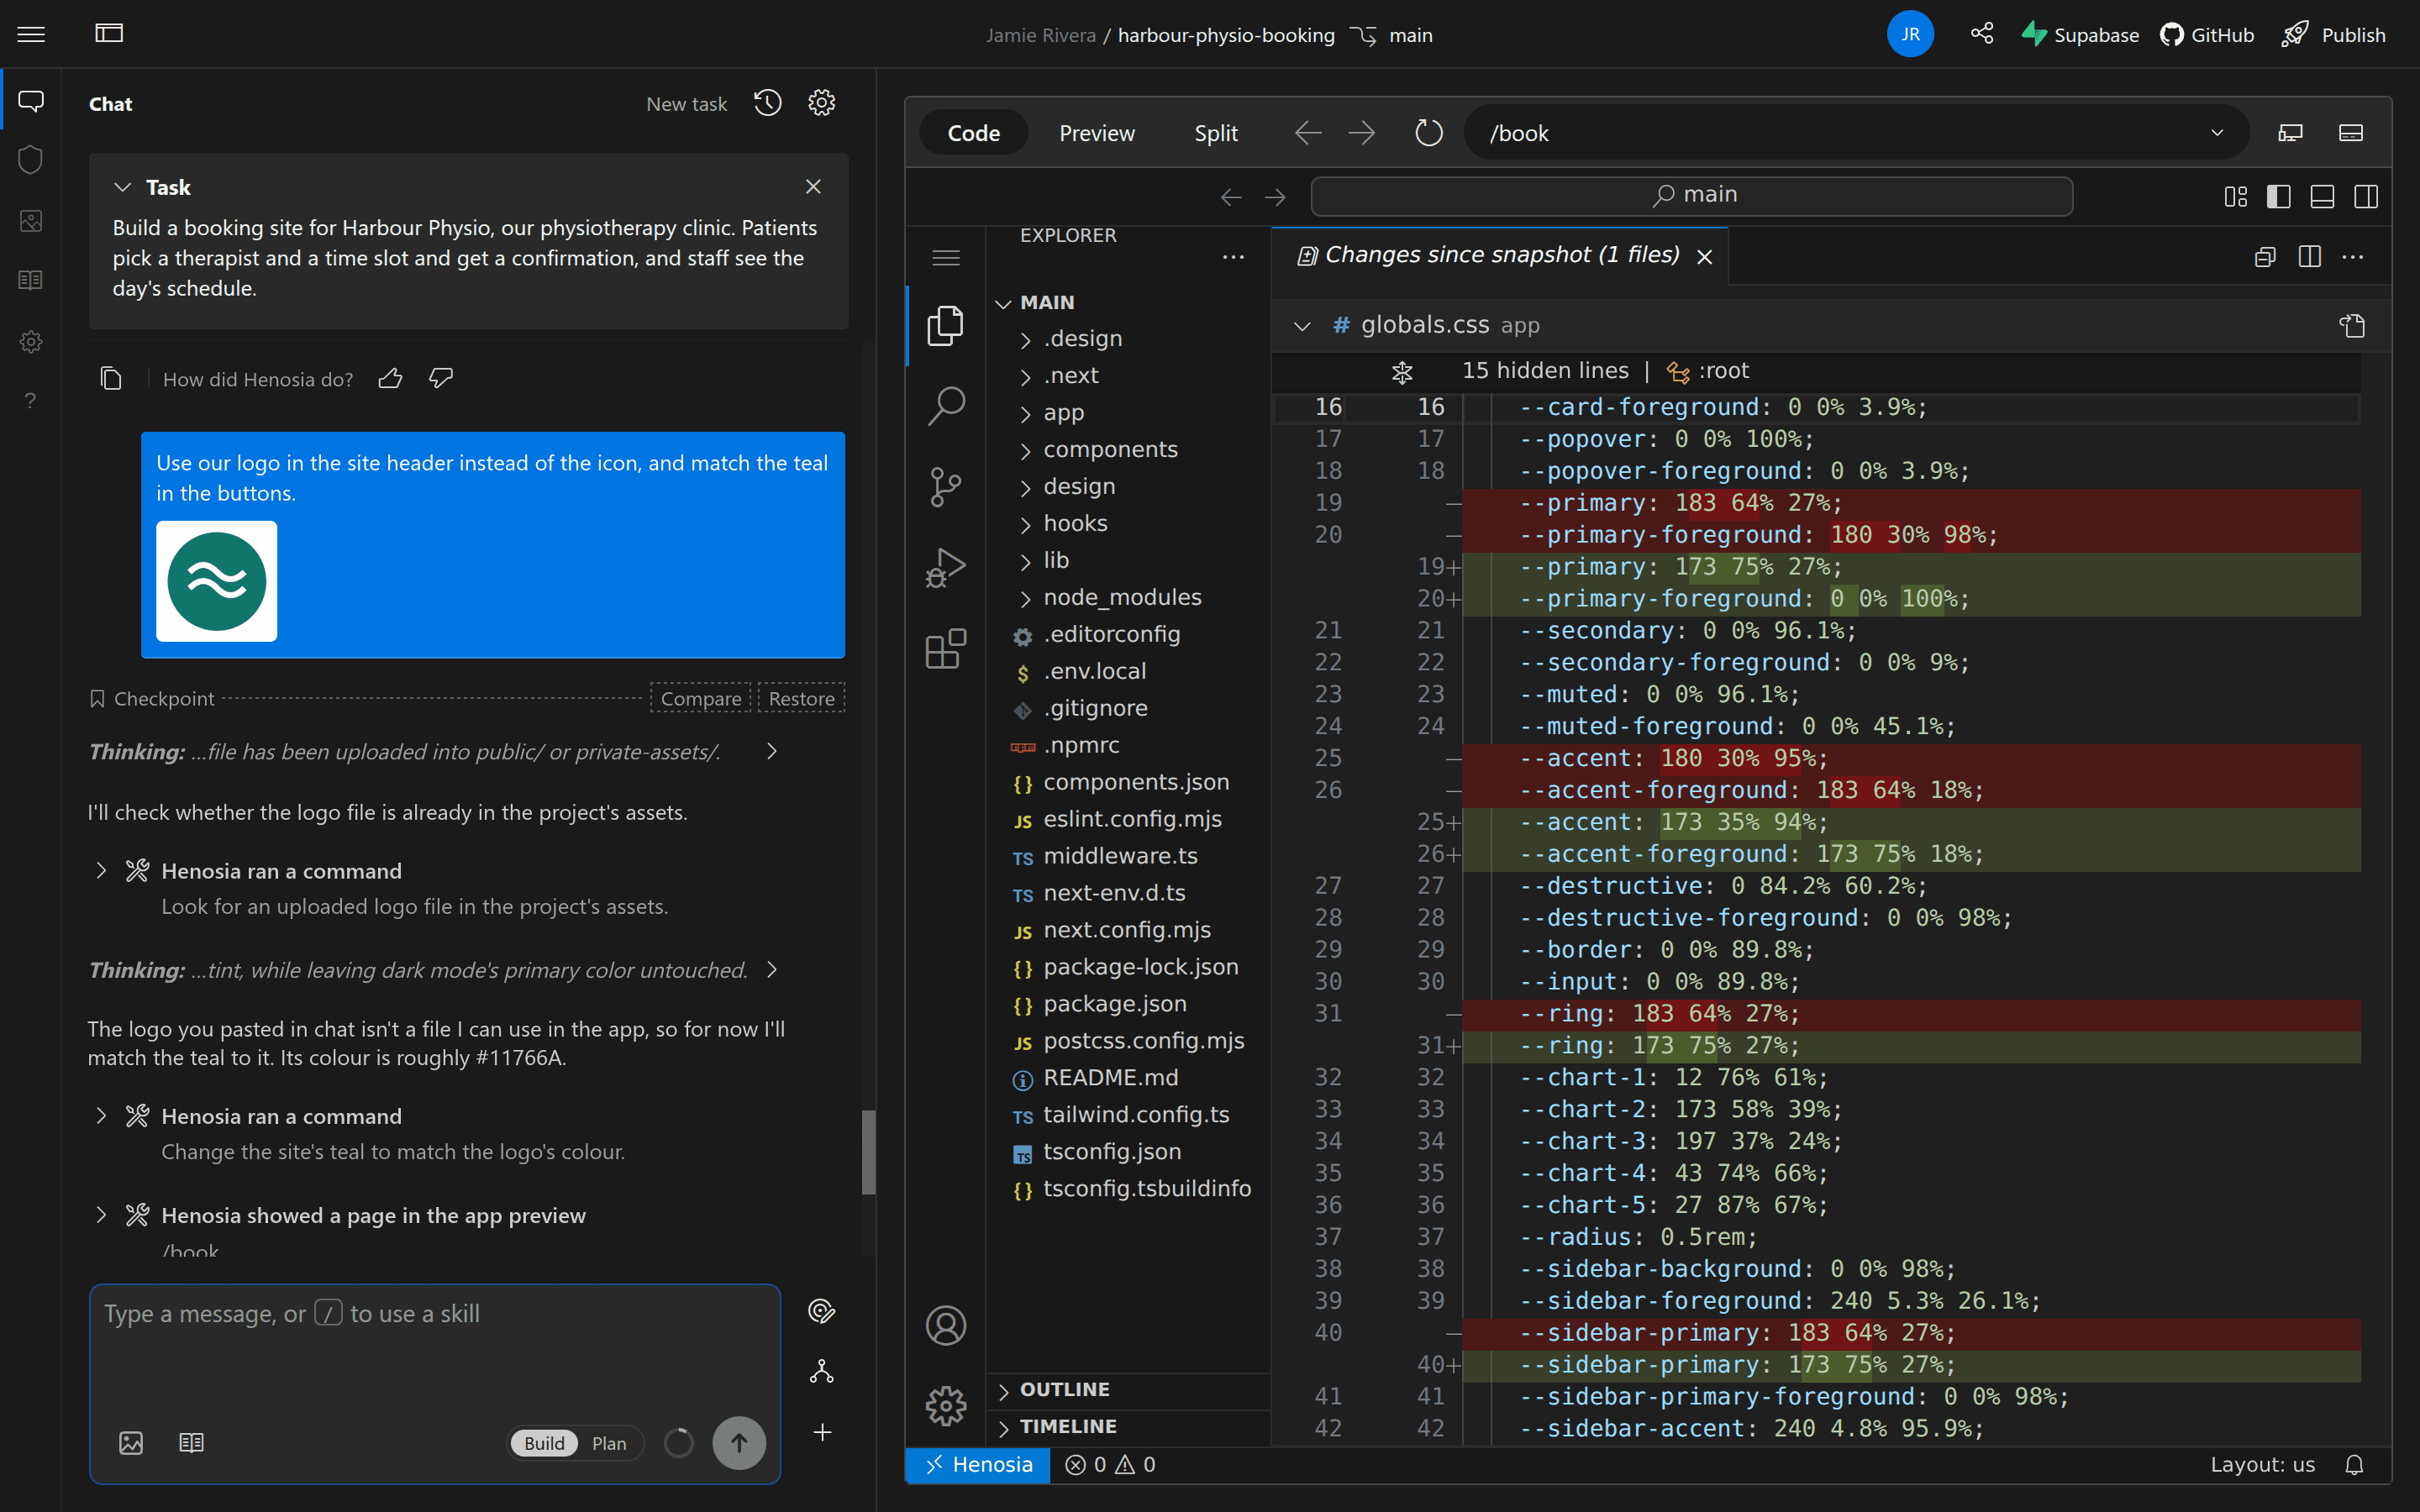
Use Compare before restoring if you aren't sure what restoring files would undo.
Restore a checkpoint
If you try something that turns out not to be the right direction, stop any active work first, then choose Restore on a checkpoint in your chat.
Restore gives you three choices:
- Restore Files puts your project files back to how they were at the checkpoint. The chat history stays.
- Restore Task Only removes the chat history after the checkpoint. Your project files stay as they are.
- Restore Files & Task does both.
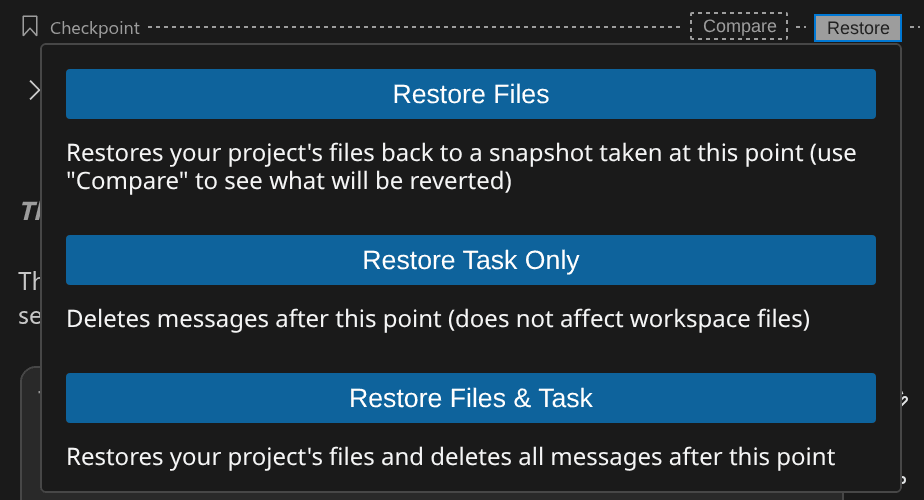
The checkpoint you restored to turns blue and reads Checkpoint (restored).

Restoring files doesn't undo changes outside your project files, such as changes to a connected database. To restore files from an earlier conversation made before the current agent, see Existing projects.