Build and share your first team tool
This tutorial follows one internal tool from start to finish: a holiday-request tracker for a 40-person clinic team across three Copenhagen clinics (Harbour Physio), where staff request days off and see their remaining 25-day allowance, clinic team leads approve or reject requests for their own clinic, and everyone sees a shared coverage calendar.
Along the way, you will plan the app, connect a Supabase database with Row Level Security, verify access rules in the Security panel, share the project with a colleague in the builder, and publish it for your organization with Henosia Auth.
Start from Build inspiration
After you sign in and complete onboarding, open your Dashboard at app.henosia.com. Below What do you want to build?, Build inspiration lists project ideas tailored to your role and goals.
- Choose a team-tool card in Build inspiration (or, if you skipped onboarding, click straight into What do you want to build?).
- Henosia writes a starter prompt into the prompt field, switches the mode toggle to Build, and opens Start building this idea over the right side of the box. Choose Edit first to close that callout so you can review the prompt and add your team's rules before sending.
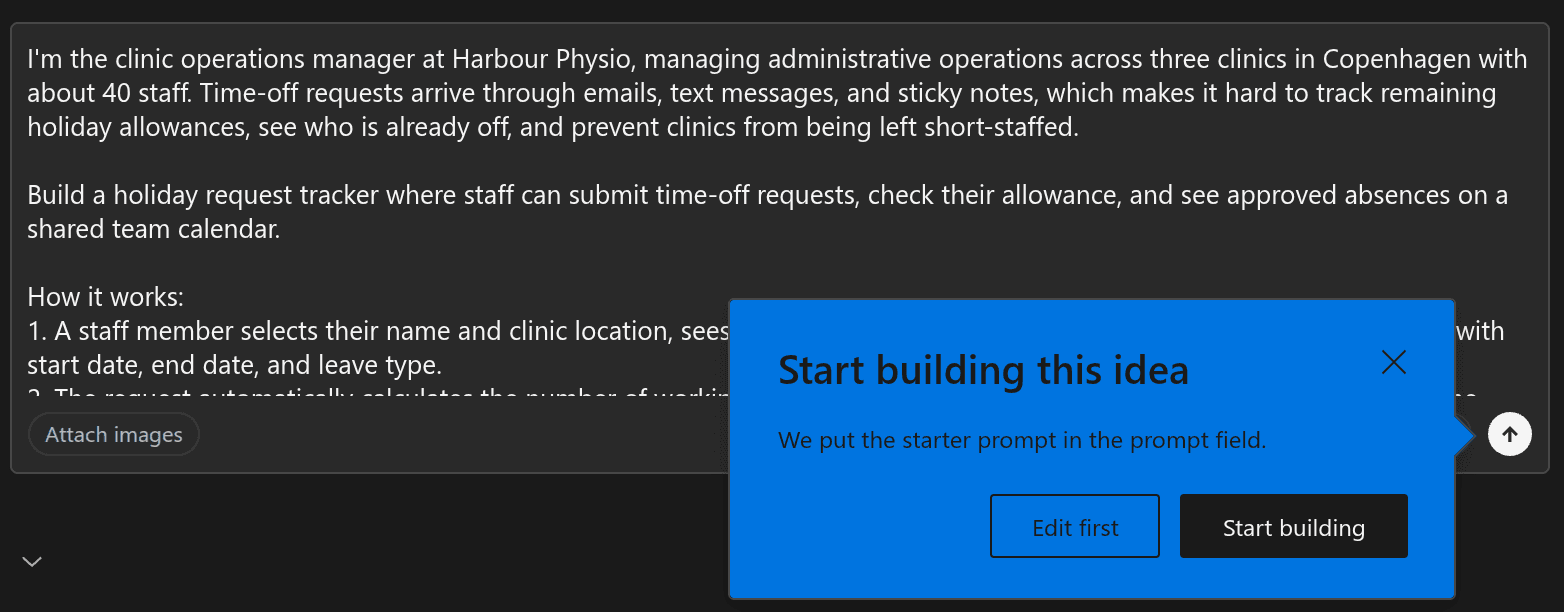
- Adapt the prompt with the specifics Henosia can't guess on its own: who uses the tool, how allowances work, and which requests each role may see.
Replace the clinics, roles, and allowance rules with your own team's setup, or copy this prompt to follow along.
I'm the clinic operations manager at Harbour Physio, managing three clinics in Copenhagen (Østerbro, Vesterbro, and City Centre) with about 40 staff.

Build a holiday request tracker for our team:
- Staff submit holiday requests with start date, end date, and an optional note, and see their remaining annual allowance (25 working days).
- Team leads view and approve or reject pending requests for their own clinic only, with an optional comment.
- Everyone sees a shared team calendar of approved absences filterable by clinic so shifts stay covered, without seeing other people's notes or rejected requests.
- Switch the toggle in the bottom right of the prompt field from Build to Plan, then press Enter (or choose Submit).
Henosia names and creates the project (including Henosia Auth on most accounts) and opens the builder in Plan mode. If you chose Start building instead, Henosia starts in Build right away, and any follow-up task you start with New task begins in Plan.
Plan, then start the build
In Plan mode, Henosia inspects your project template without editing any files.
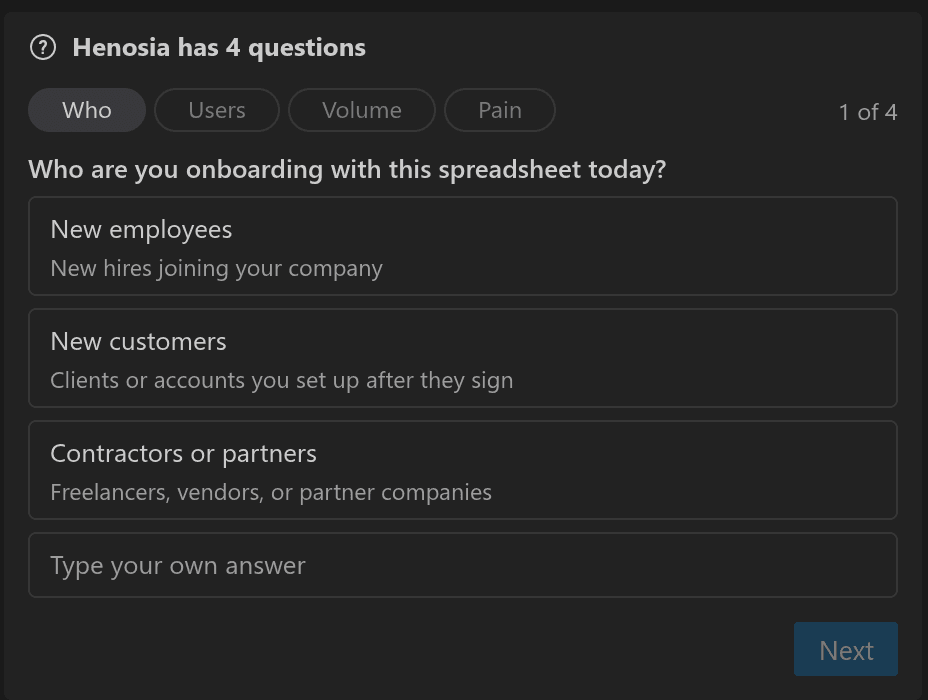
If a rule needs your input first, Henosia shows a short question form in chat. Pick an option or choose Type your own answer (and choose Submit answers on the review step when there are multiple questions).
Once Henosia writes out the plan in chat, read through the proposed pages, database tables, roles, and verification steps:
- Confirm that team leads can view and approve pending requests only for their own clinic, enforced in database rules rather than just hidden in the UI.
- Confirm that the shared calendar shows approved dates without exposing private notes or rejected requests to other staff.
- Check any sign-in assumptions: if your teammates are members of your Henosia organization, organization sign-in covers them by default when you publish, whereas staff without Henosia accounts can be invited as guests later.
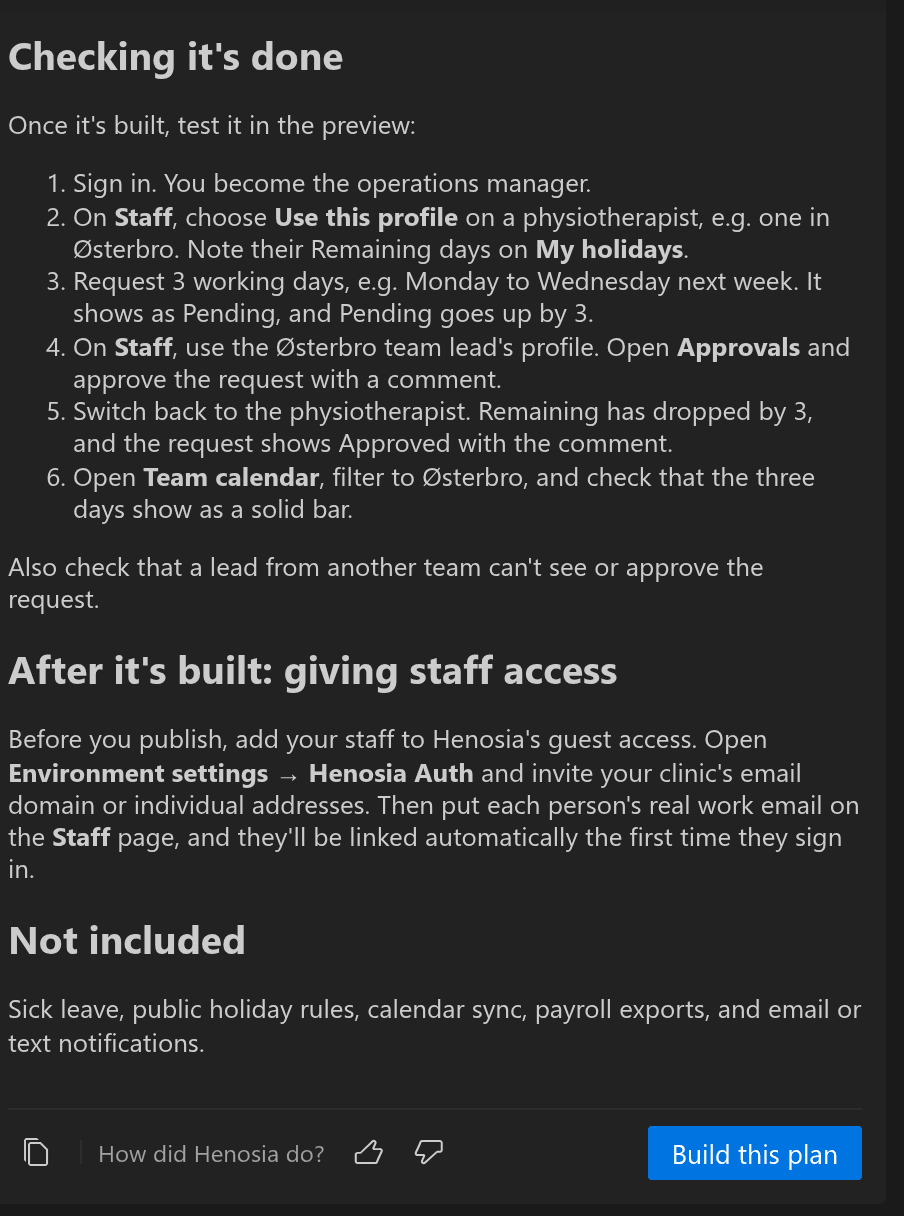
If you want to change anything, reply in chat and Henosia rewrites the full updated plan in one place. When the plan matches how your team works, choose Build this plan.
Because a shared holiday tracker needs persistent tables and Row Level Security across colleagues, Henosia switches to Build, shows a Henosia integrates with Supabase card in chat with Connect Supabase, and waits before writing database code.
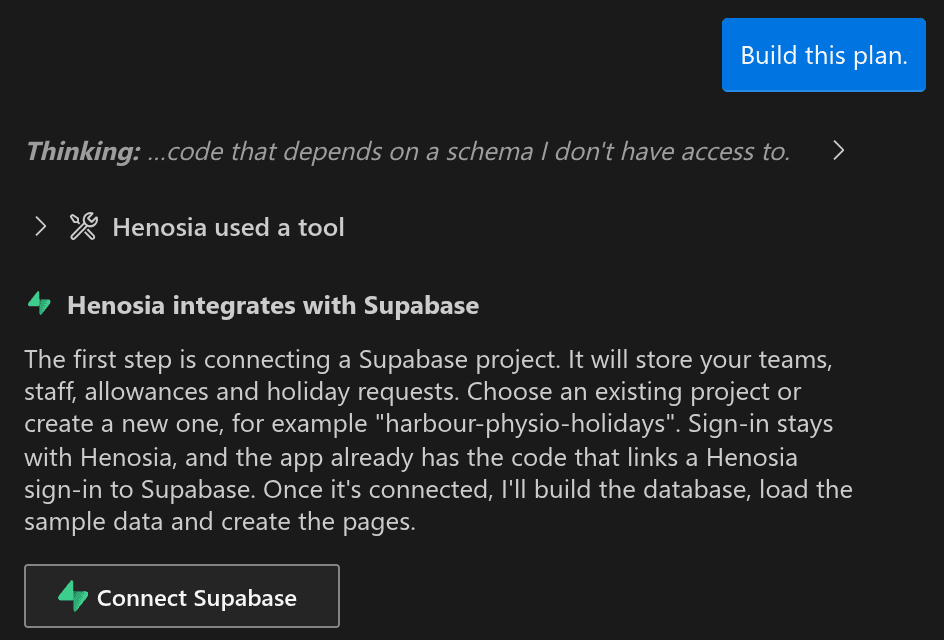
Connect Supabase and approve the data plan
Connecting Supabase gives your tool a PostgreSQL database and Row Level Security (RLS) policies tied to each signed-in colleague.
- Choose Connect Supabase on the card in chat (which opens Supabase project connection in the top-right bar), then choose Connect Supabase project. (If your organization provides Self-hosted Supabase, the callout reads Supabase for this project is provided by <your organization> and skips the
supabase.comstep.) - In the
supabase.comwindow that opens, sign in (or create a free Supabase account), choose your Supabase organization, and authorize Henosia. When you see Your Supabase organization is now connected!, close the window (or let it close automatically after 10 seconds) and open Supabase in the top-right bar again. - Under This project can be connected to a Supabase project:, choose New project if you haven't created a dedicated Supabase database for this tool yet, then choose the checkmark next to your active project. When your project includes Henosia Auth, connecting registers Henosia Auth as a sign-in provider in Supabase automatically.
- Once connected, Henosia picks up the paused Build task automatically (if you closed or reloaded the project before connecting, send a short message in Build asking Henosia to continue building the plan). It creates the tables and Row Level Security policies from the plan you approved above, loads sample clinic data, builds the pages, checks the logs, and opens your running holiday tracker in Preview on the right.
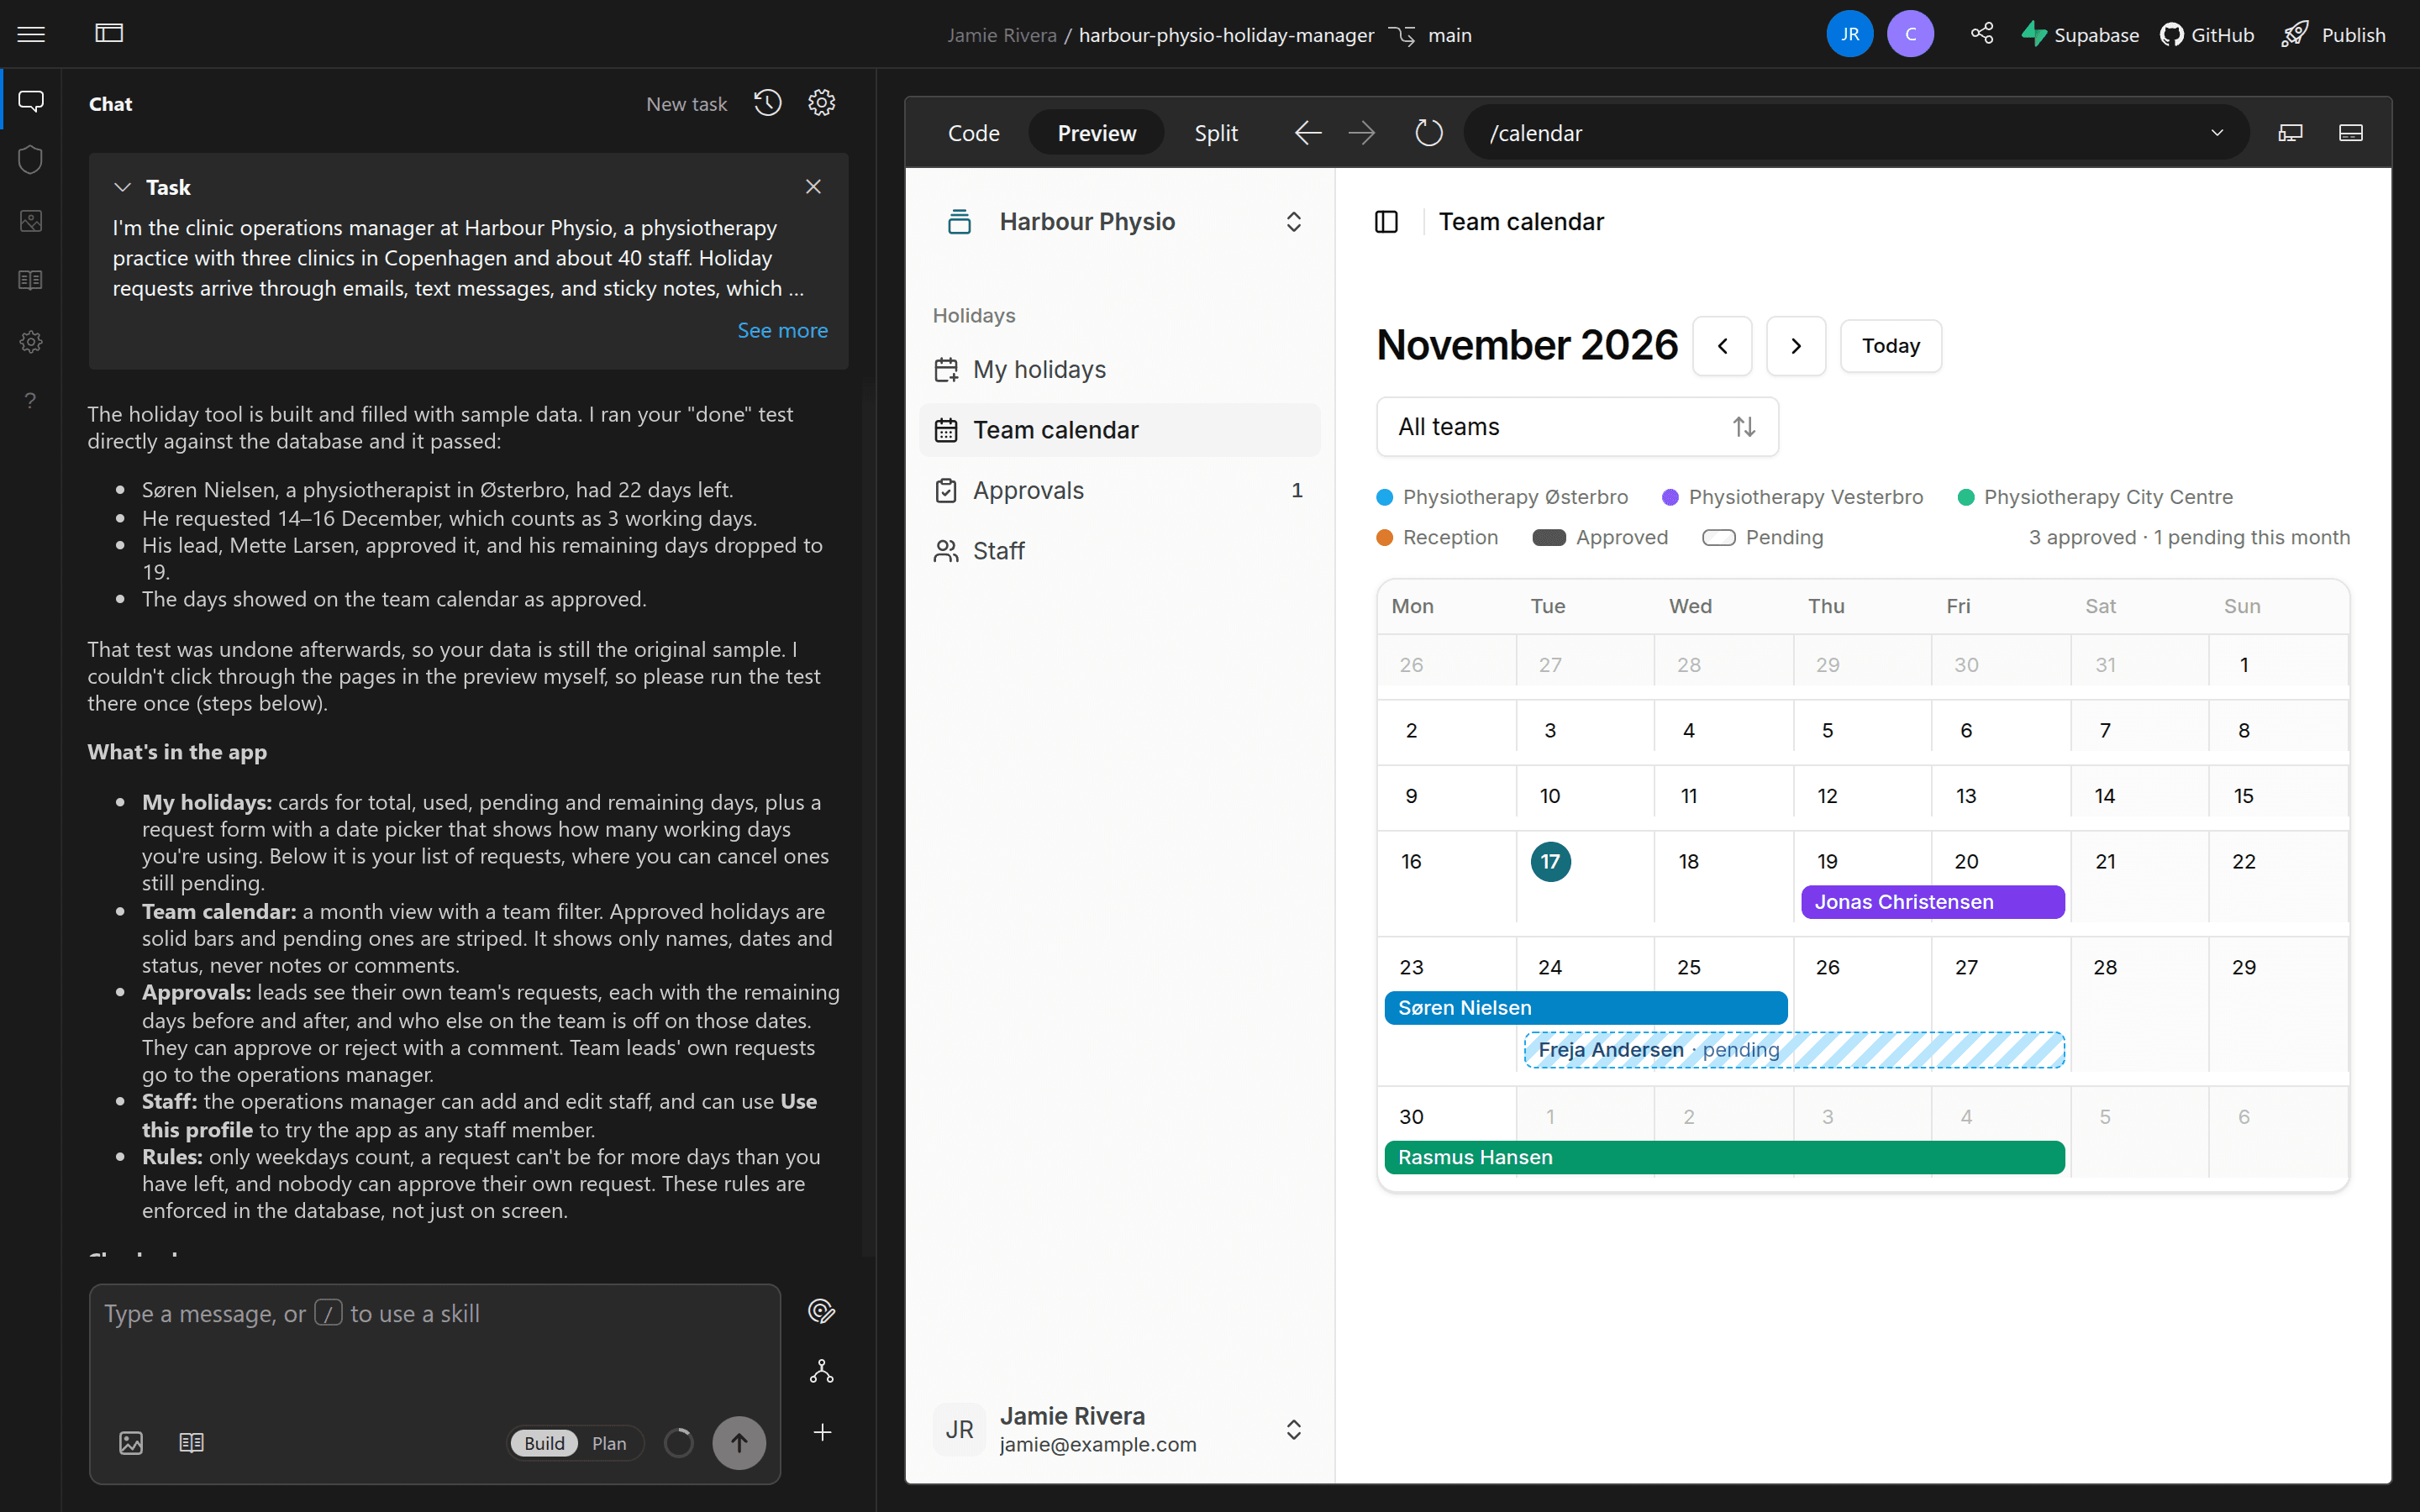
If instead you built a browser-only prototype with sample data in memory or localStorage before connecting a database (or started from a Blank project without Henosia Auth), open Supabase in the top-right bar, choose Add Supabase functionality, and select Supabase connectivity powered by Henosia Auth (or Supabase login using passwords on a project without Henosia Auth; see Sign-in for your app's users).
In that flow, Henosia reads your existing screens and presents a plain-language persistence and data access security plan as a question in chat for your approval before creating any tables:
- Signed-in identity: requests and approvals are tied to each signed-in colleague's account rather than only a demo profile switcher.
- Database-enforced clinic boundaries: Row Level Security policies allow staff to create and view their own requests (plus approved calendar dates for coverage), and allow team leads to view and approve or reject requests only for their own clinic.
Try the finished app in Preview: submit a holiday request, approve it as that clinic's team lead, and verify that the dates appear on the shared calendar while another clinic's lead cannot view or act on the request.
Check the Security panel
Before inviting teammates or entering real leave dates, verify that no table policy or package issue was missed.
- Choose Security (the shield icon) in the builder's left toolbar. The Security panel opens on the right in place of the preview while keeping your chat open on the left.
- Under Supabase Security Advisor, check the Errors and Warnings tabs and confirm there are zero errors such as a public table with Row Level Security turned off.
- Under Project Upgrade Security Advisor, check that Critical has no open framework package advisories.
If any finding appears, select the row to expand it. Type a short note in the prompt box explaining who should be allowed to read or change that data and press Enter or choose Submit (or choose Attempt fix without prompting). For database findings, Henosia prepares a fix in Plan mode so you can review the exact access rule and choose Build this plan, then choose Refresh in Supabase Security Advisor to confirm the error cleared.
Choose Back to preview (×) in the top right of the panel to return to your app. See Security panel.
Share with teammates in the builder
Before putting the tool at its own web address, invite a team lead or colleague into the project to try the holiday flow in Preview and refine it together.
Organization owners and admins already have automatic access to every member's projects (under Organizations > your organization > Projects on the dashboard). To invite another colleague:
- Choose the Share icon (Share the project & invite collaborators) in the top-right bar, next to Supabase.
- In Share & Invite Collaborators, enter your colleague's name under Name of user (Role is Editor) and choose Create invite link.
- Copy the Invite link and send it to your colleague. Each link works once and expires after 8 hours, so create a separate link for each person you invite.
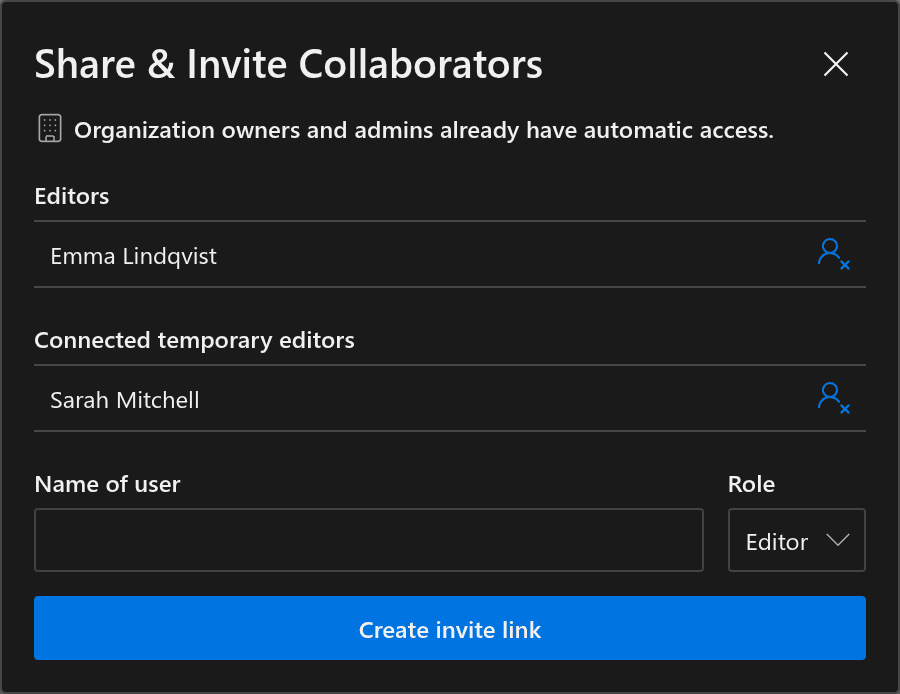
When a colleague who is signed in to Henosia opens the link and chooses Accept invitation, they join under Editors until you remove them. Someone who isn't signed in joins right away under Connected temporary editors for up to 8 hours from when the link was created, or until you remove them. See Work with your team.
On the trial plan?
Publishing an app to its own live website requires a paid plan. On the trial plan, opening Publish shows Your current plan does not include publishing. To publish your app, please upgrade to a paid plan. with Upgrade to a paid plan (or asks you to contact your subscription owner if someone else manages billing).
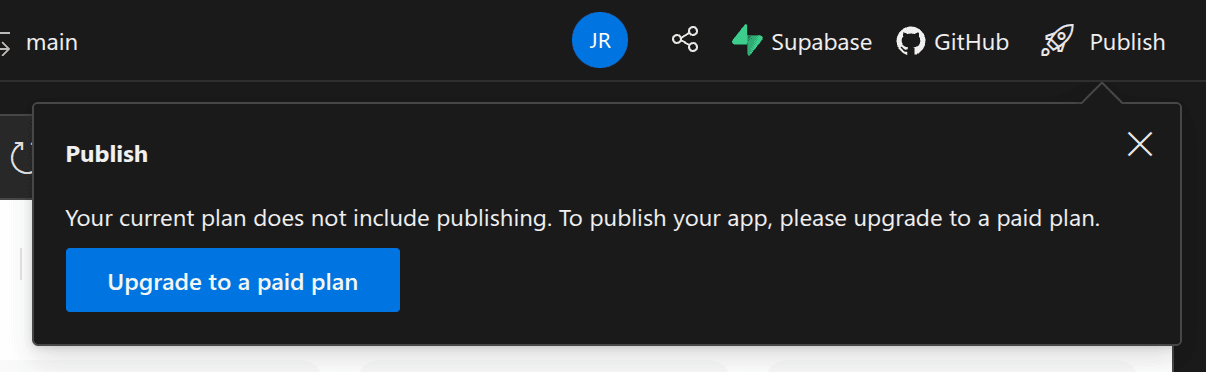
While you're on the trial, use Share in Share with teammates in the builder above instead: invite teammates as editors so they can test the live preview with you and help refine the tool in the builder. When you're ready to put the app at its own web address for the whole team, compare plans on Pricing plans and Current prices or open Plan and billing on your dashboard.
Publish with Henosia Auth for your organization
Once you're on a paid plan, publish the holiday tracker so your colleagues can open it like any internal web app without opening the builder.
Confirm organization sign-in in Henosia Auth
Open Environment settings (the gear icon in the left toolbar) and choose Henosia Auth.
Once your project belongs to an organization that has other members (create one or invite teammates under Organizations on your dashboard if you haven't yet), Members who can sign in to your published app selects All members can sign in by default so everyone in your Henosia organization can sign in with their work account while outsiders are turned away.
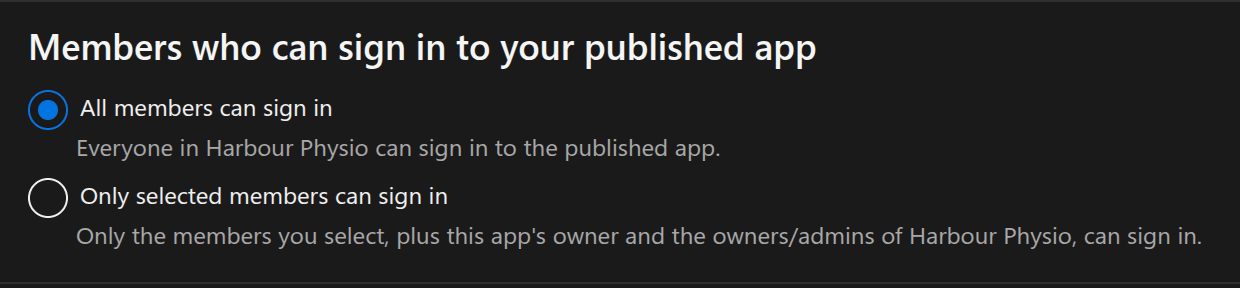
- If only one department should open the tool, switch to Only selected members can sign in and tick those colleagues (the project owner and organization owners and admins always keep access).
- If clinic staff without Henosia builder accounts or an external bookkeeper also need access to the published app, add their email addresses or company domain under Guests who can sign in to your published app (and make sure your Supabase Row Level Security rules restrict what guests can read or change).
Changes in Henosia Auth save immediately. See Henosia Auth.
Claim an address and publish
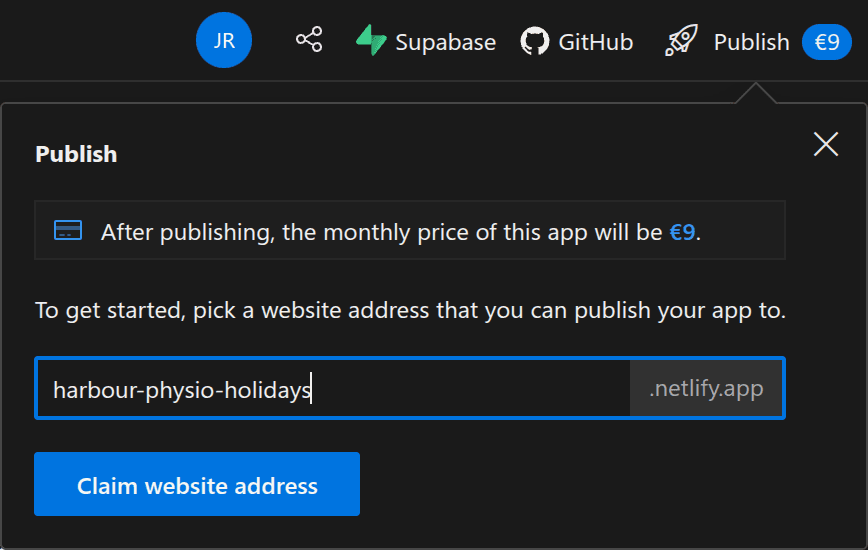
- Choose Publish in the top-right bar of the builder. The top of the dialog shows what your app's monthly fee will be once published (billed by the day only while the app stays published; see Pricing plans and Current prices).
- Enter the name you want before
.netlify.app, such asharbour-physio-holidays, and choose Claim website address.
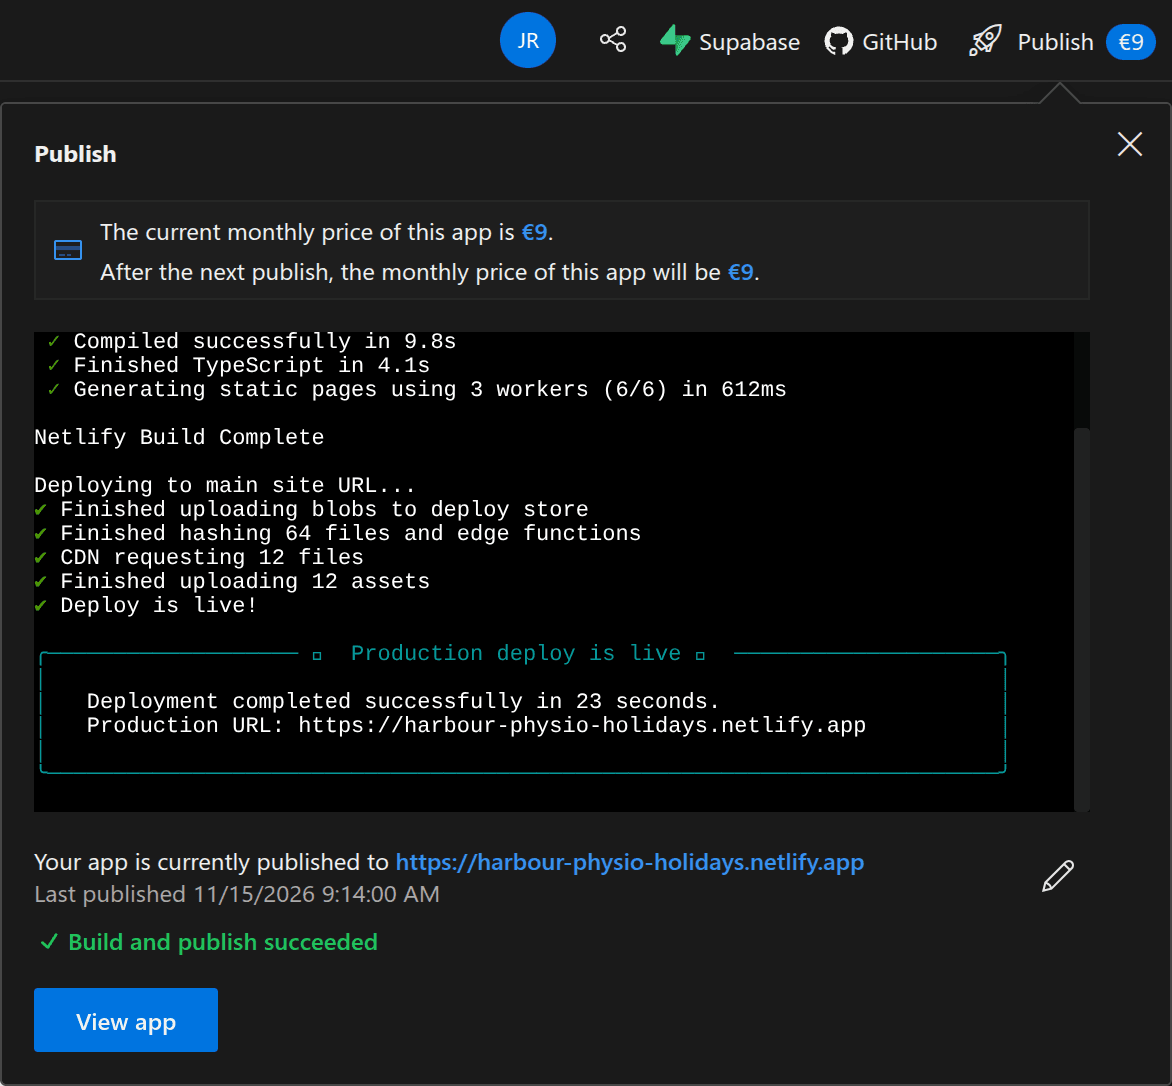
- Choose Build & Publish and follow the build output in the dialog.
- When you see Build and publish succeeded, choose View app to open
https://harbour-physio-holidays.netlify.appin a new tab.
Share that .netlify.app link with your team. Colleagues in your Henosia organization sign in with their work account, and the app also appears in their App Switcher alongside your organization's other Henosia apps. Later edits you make in the builder stay in your preview until you open Publish and choose Build & Publish again.
Next steps
Prompting guide
Steer layout and visual style, paste spreadsheet data, and save team rules in AGENTS.md or skills.
Prompt library
Copy ready-made prompts for roles, Row Level Security rules, visual styling, and pre-publish audits.
Sign-in for your app's users
Refine role-based Row Level Security rules or compare Henosia Auth with Supabase password sign-in.
Publish
Publish updates, claim a site into your own Netlify account for a custom domain, or unpublish an app.