GitHub
You don't need GitHub to build or publish an app in Henosia. Connect GitHub when you want to:
- Save a Henosia project to your company's GitHub so you keep a copy of the code.
- Work on the same app with developers who edit code in their own editor.
- Bring an existing GitHub repository into Henosia.
Plan and billing
Syncing projects with GitHub requires the AppGen Business plan.
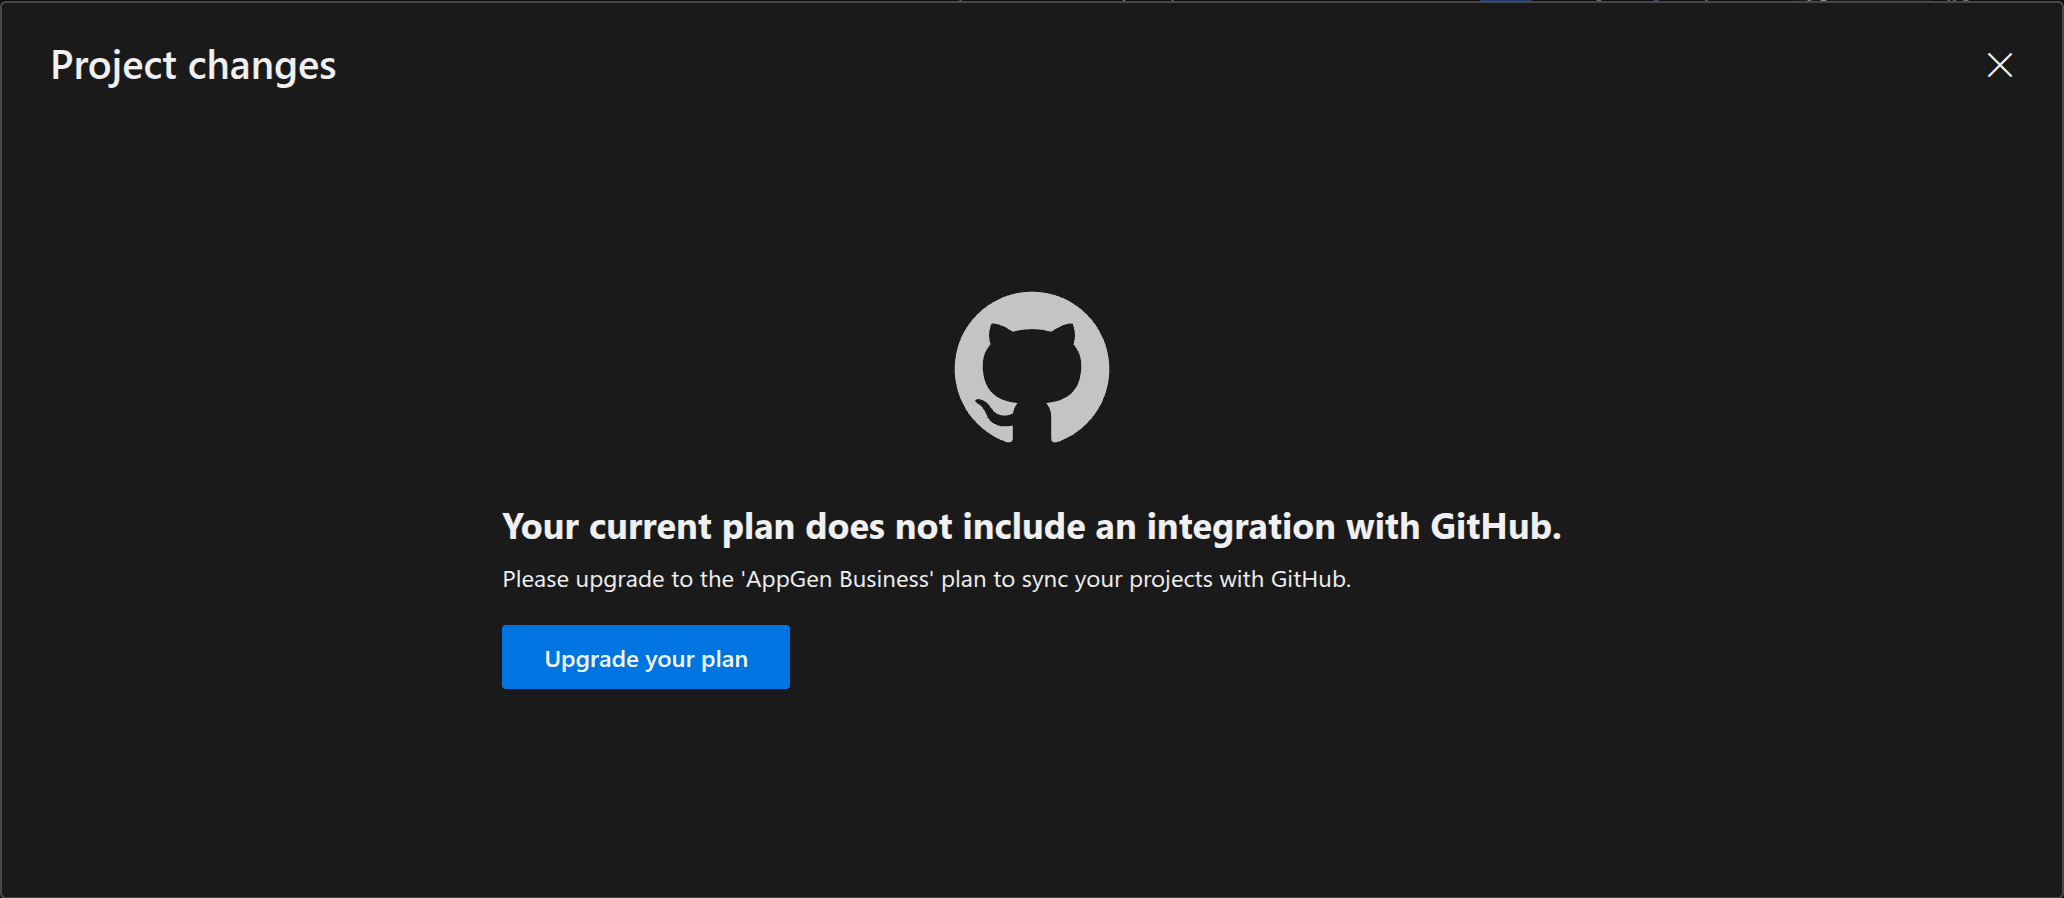
On other plans, choosing GitHub in the builder shows Your current plan does not include an integration with GitHub. Choose Upgrade your plan to upgrade, or contact your subscription's owner if your plan comes from your organization (which disables the button). On the dashboard, Import lets you connect GitHub and browse repositories on any plan, then shows the upgrade message if you choose Open.
Importing public skills from GitHub on the Organization skills page doesn't require AppGen Business.
Monthly app price
Linking a project to GitHub counts it as a published app for monthly app billing. This applies both when you create a new GitHub repository from Henosia and when you open an imported repository:
- An imported repository has no monthly app fee until you use Henosia's AI in that project.
- If your app is already published through Publish, linking GitHub doesn't add a second app fee.
- If your app isn't published through Publish, Project changes shows its monthly price before you create a repository, and shows its current monthly price once linked.
See Pricing plans and Current prices for how subscription plans and monthly app fees work.
Connect your GitHub account
Connecting GitHub is only for repository access. You still sign in to Henosia with your Google Workspace account, Microsoft 365 account, or company email sign-in link or code.
You can connect your GitHub account in three places:
- From the dashboard: Choose Import in the top right, or scroll to GitHub repositories on Home and choose Connect your GitHub account.

- From the left sidebar: Open GitHub > GitHub Account and choose Connect your GitHub account. Once connected, this page shows your GitHub profile and Edit settings on GitHub.com, where you can review or remove repository access.
- From the builder: On AppGen Business, open a project, choose GitHub in the top-right bar to open Project changes, and choose Connect your GitHub account.
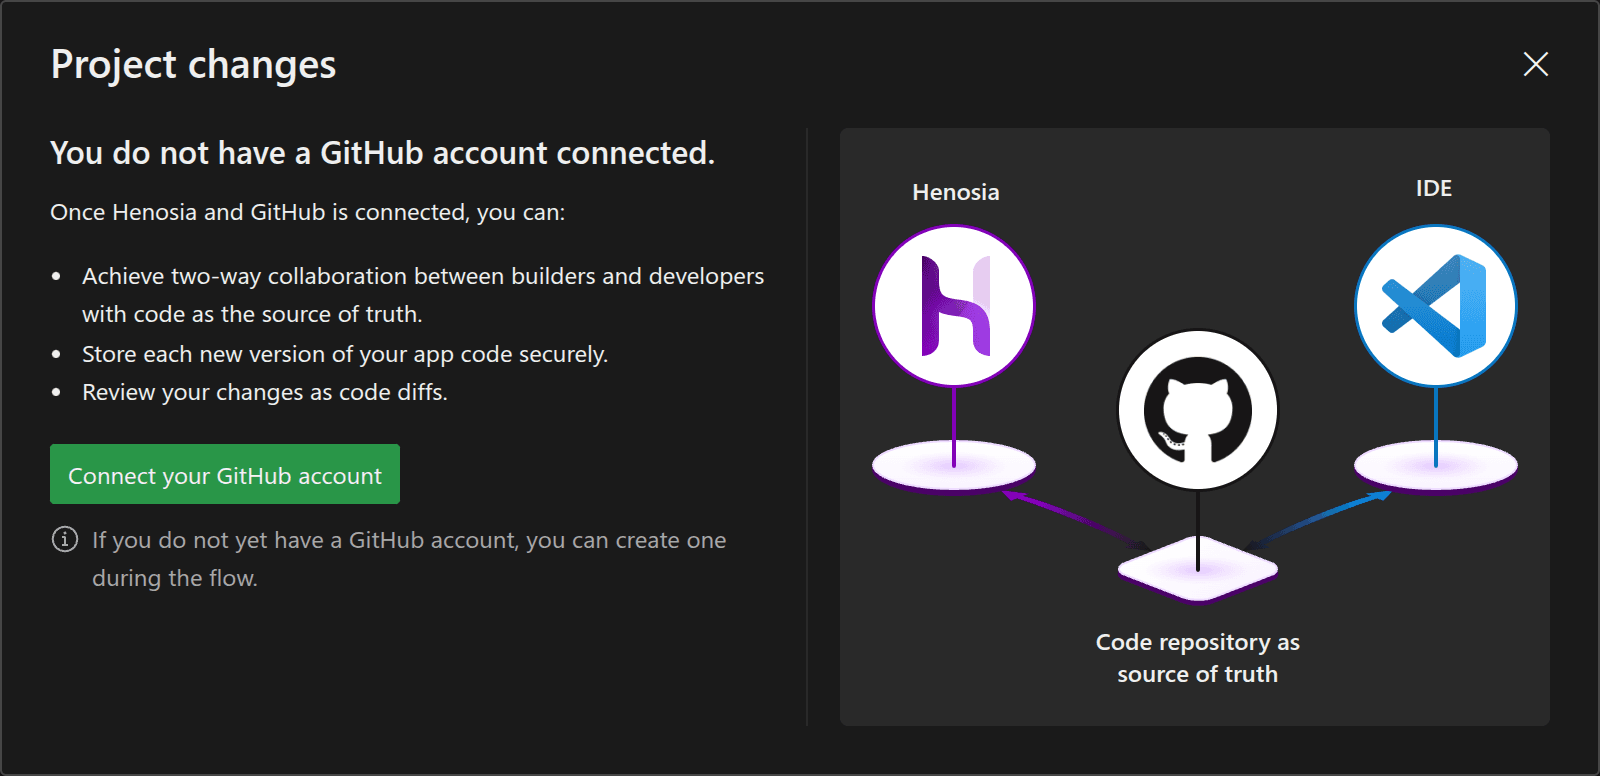
Henosia opens GitHub's authorization page in a popup window. If you don't have a GitHub account yet, you can create one during that step. If nothing opens, allow popups for Henosia in your browser and try again.
Put a Henosia project on GitHub
To save a project you started in Henosia to a new GitHub repository:
- Open the project in the builder and choose GitHub in the top-right bar to open Project changes.
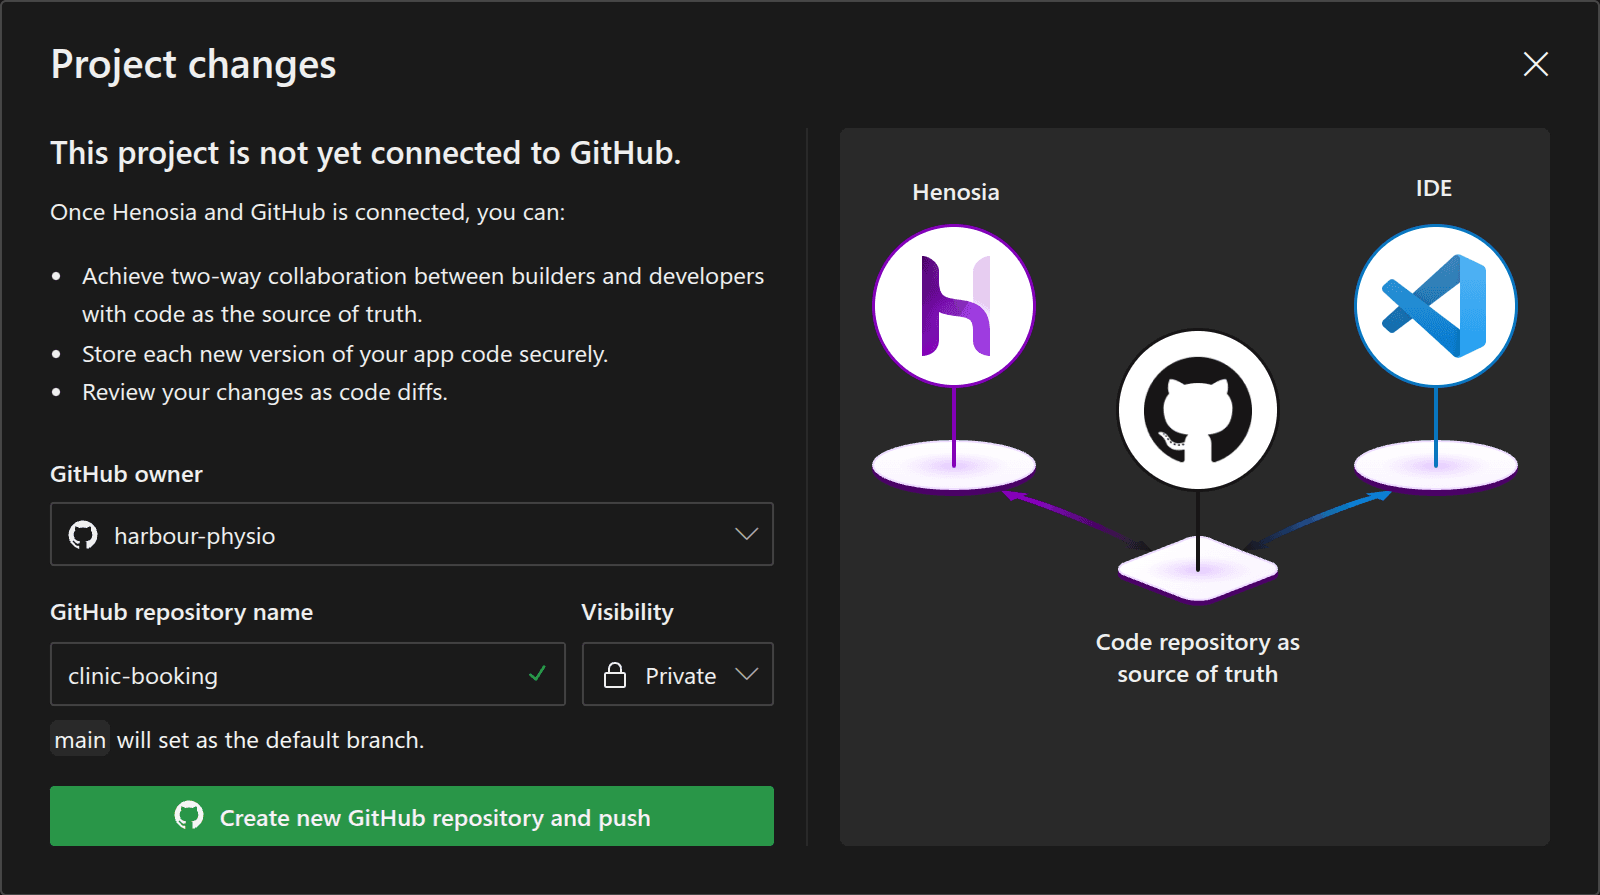
- Choose GitHub owner and pick your GitHub username or one of your GitHub organizations.
- Check or edit GitHub repository name and set Visibility to Private (the default) or Public. Henosia fills in a starting name from your project and checks whether it is available. Your project's current branch becomes the repository's default branch.
- When the green check mark shows the name is available, choose Create new GitHub repository and push. When it finishes, choose View project on GitHub or Okay.
Push and pull changes
Once a project is linked to GitHub, choose GitHub in the top-right bar to open Project changes:
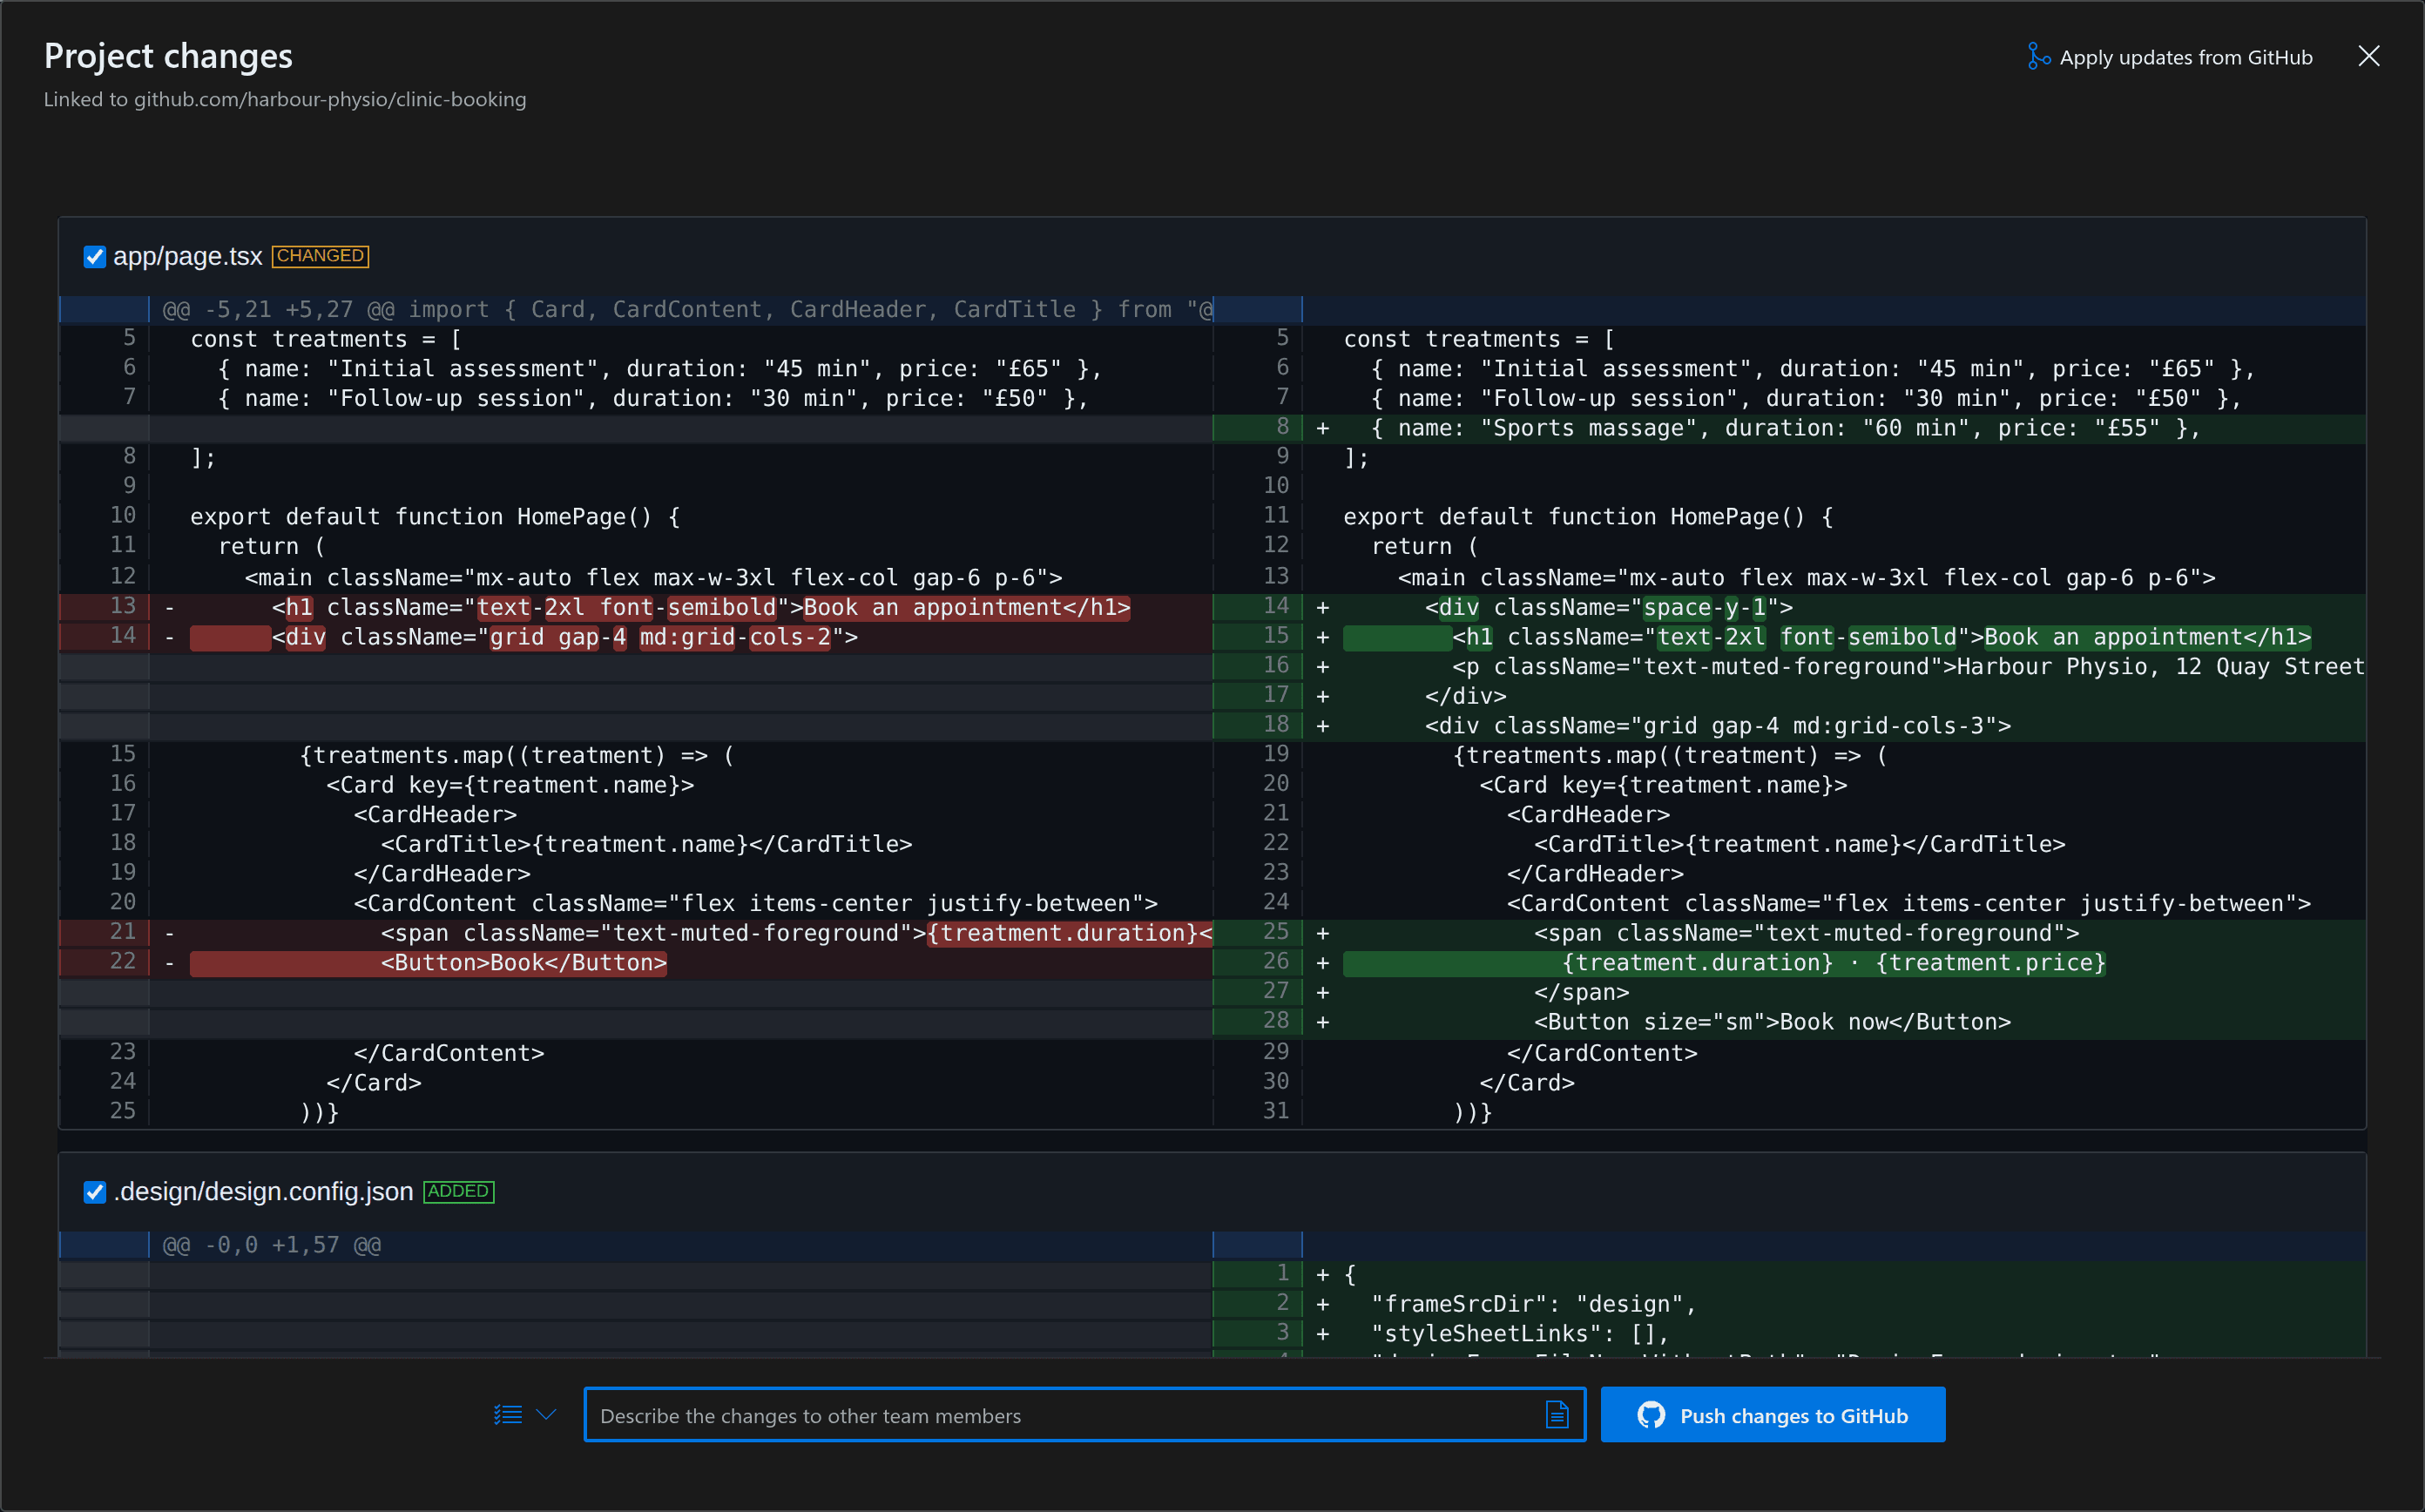
- Send your changes to GitHub: Review your changed, added, and deleted files side by side. Tick the files you want to include, write a short note in Describe the changes to other team members, and choose Push changes to GitHub. You must enter a description before pushing.
- Bring in updates from GitHub: When someone pushes commits to your branch outside Henosia, choose Apply updates from GitHub in the top right of Project changes. If Henosia spots new commits on GitHub while you have the project open, it also offers Update now.
- Fix conflicting edits: If changes from GitHub overlap with edits you made in Henosia, Project changes lists each file under Conflicts. Edit the file text in the box and choose Resolve conflict.
Branches and chat
You can't create or switch branches inside the builder, and Henosia doesn't switch branches in chat. If Henosia wants to run git push and you didn't ask it to push, it pauses and asks for your approval first.
Import a repository from GitHub
If your team already has a compatible app on GitHub, you can bring it into Henosia.
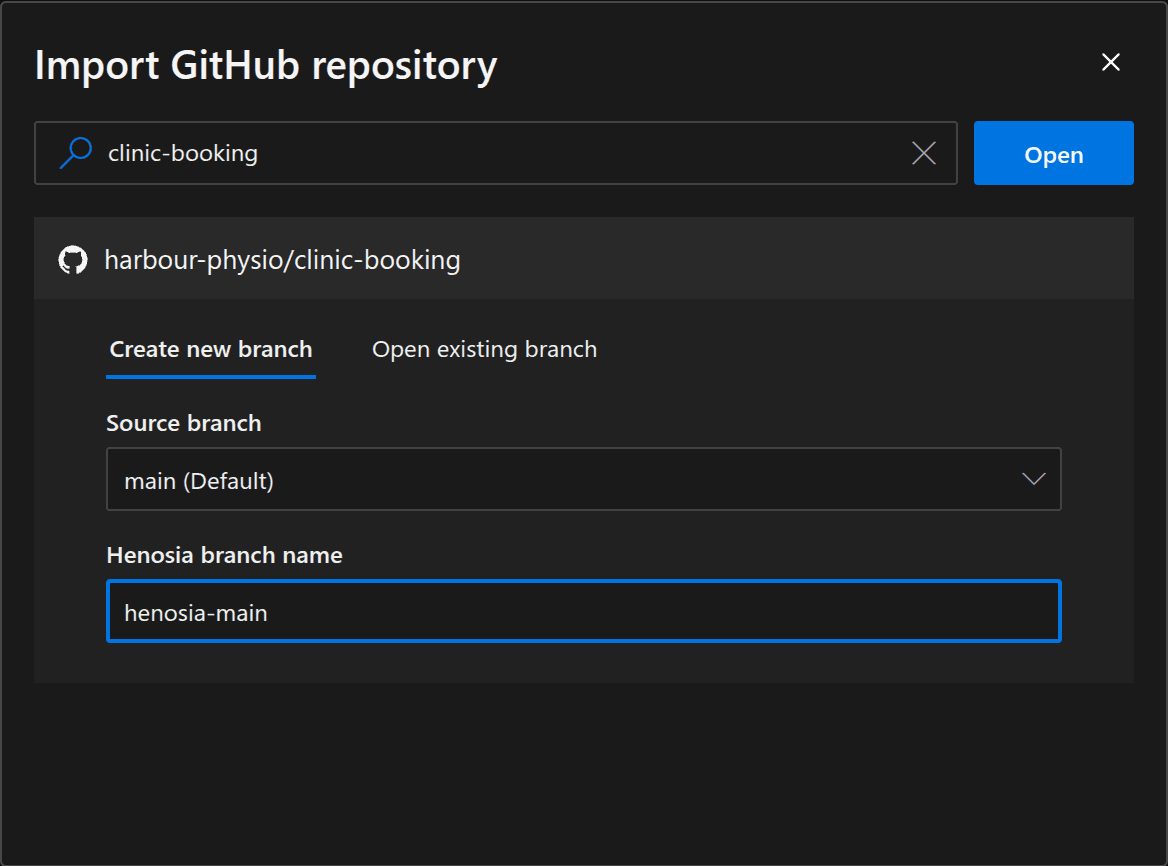
Once your GitHub account is connected on AppGen Business, choose Import in the top right of the dashboard, or choose Import GitHub repository under GitHub repositories on Home:
- Search for and select your repository by
owner/name. Henosia loads up to the first 100 repositories your GitHub account can access, in alphabetical order, and the search box filters that list. - Choose how to open the repository's branches:
- Create new branch (default): Pick a Source branch, where the default branch is marked
(Default), and enter a Henosia branch name. Henosia fills inhenosia-<branch>, such ashenosia-main, so your changes stay on their own branch until your team merges them on GitHub. - Open existing branch: Pick a Source branch to work directly on that branch.
- Create new branch (default): Pick a Source branch, where the default branch is marked
- Choose Open to link the repository and open it in the builder. To work on another branch later, import the repository again and pick that branch.
Project compatibility and setup files
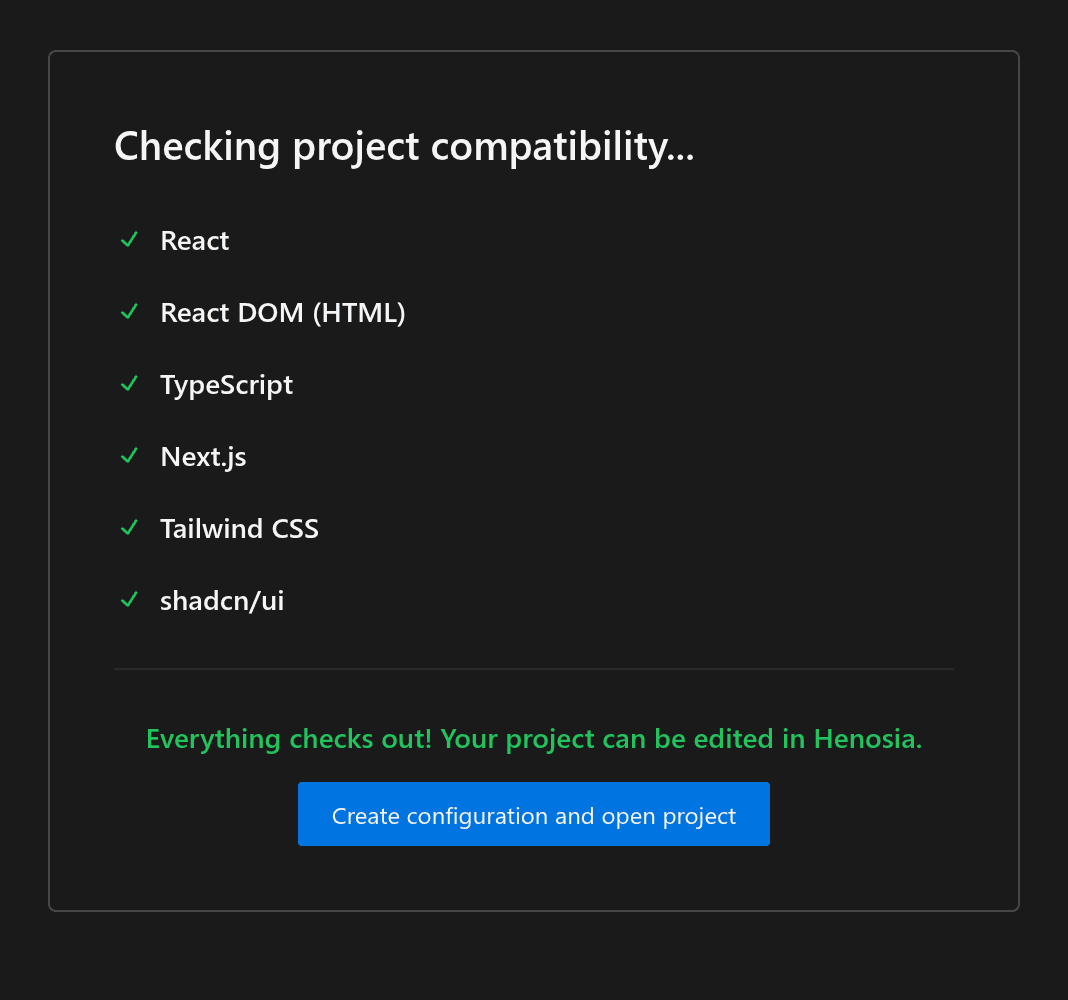
When you open a branch that hasn't been set up for Henosia yet, Henosia installs its packages and shows Checking project compatibility... on the canvas. If the repository is a monorepo with more than one package.json, use Monorepo package to open in Henosia to pick which app to open; Henosia preselects the closest match.
To open in Henosia, the project needs:
- React, React DOM (HTML), TypeScript, Next.js (App Router), Tailwind CSS, and shadcn/ui (detected from
components.json). - A
package.json, atsconfig.json, and apnpm-lock.yaml,yarn.lock, orpackage-lock.jsonlockfile anywhere in the repository.
Henosia then shows one of three results:
- Everything checks out! Your project can be edited in Henosia. Choose Create configuration and open project.
- You can edit your project in Henosia, but with limitations - shown when the Next.js app uses the Pages Router instead of the App Router. Choose Open with limited functionality, or use Talk to us on Discord or Explore project templates.
- Unfortunately, this project cannot be edited in Henosia. Shown when any of the six items above, including shadcn/ui, is missing. Choose Explore project templates or Talk to us on Discord.
In a monorepo, the second and third headings say project package instead of project.
When you choose Create configuration and open project or Open with limited functionality, Henosia adds .design/design.config.json and TypeScript helper files in design/, or src/design/ when the project uses src/. If needed, it also adds that folder to tsconfig.json, and in a monorepo it adds a "henosia" field to the selected package.json. These files appear in Project changes as local edits you can push to GitHub.
Manage GitHub for team projects
In an organization, Owner and Admin members (and Parent admin members from a parent organization) automatically have builder access to members' projects.
Three rules apply when working with GitHub on user-owned projects:
- Project creators and organization admins: Only the project's creator and your organization's Owner, Admin, and Parent admin members can connect a repository, push changes, pull updates, or resolve conflicts.
- Invited editors: Collaborators invited only as Editor can view diffs in Project changes when their own plan includes GitHub, and see the plan-upgrade screen when it doesn't. They cannot connect a repository, and if they try to push, pull, or resolve a conflict, Henosia refuses the action.
- Whose GitHub account runs: Every push and pull uses the connected GitHub account of the person clicking the button, never another member's account. To push or pull on a member's project, an admin needs their own GitHub account connected in Henosia and access to that repository on GitHub.